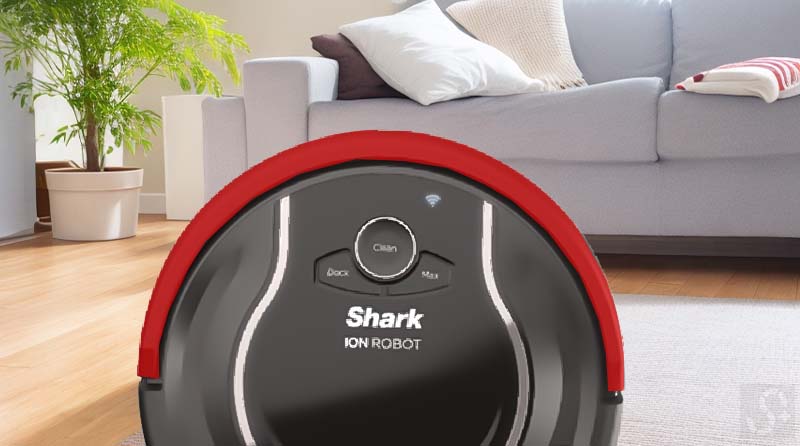
Shark Robot Vacuums can be a huge time saver, but what happens when you run into problems – like a front bumper that’s gotten stuck, or a robot that thinks the front bumper is jammed?
If the front bumper of your Shark Robot is getting stuck, then fixing it could be as simple as moving a minor obstacle or shaking out some debris that’s been trapped. Or, the situation might get a little more complicated and require some disassembly to resolve the matter.
Let’s look at some potential issues that might cause stuck bumpers, and how to resolve them most efficiently.
| Causes: | Fixes/Troubleshooting: |
| Small obstacle or unevenness in the surface | Smooth out the floor to remove any small blockages |
| Caught on debris in the bumper | Remove the robot and brush away obstructing objects; shake or tap the robot to dislodge loose debris |
| Debris or small object wedged under the bumper | Turn the robot upside down to inspect; if necessary, remove the bumper to clear the obstruction |
| Bumper is cracked or outright broken | Remove the bumper; if possible, apply superglue to fix the crack, or replace the bumper entirely |
| Sensors are malfunctioning | Clean the sensors with a soft cloth; if necessary, contact the manufacturer for replacement |
Why Is My Shark Robot Front Bumper Getting Stuck?
There are many reasons for the front bumper to get stuck on your Shark Robot. In terms of increasing complexity and difficulty in resolving, these are the most likely causes:
- Small obstacle or unevenness in the surface, which causes a hang-up
- Caught on some debris in the bumper
- Debris or small object wedged under the bumper
- The bumper is cracked or outright broken
- Sensors are malfunctioning
Small obstacles and broken bumpers might be easy to see, but they can still be vexing if it’s a small enough problem. Here are some ideas on how to handle each of these issues.
What If It’s A Small Obstacle or Surface Unevenness?
First, check for a small obstruction, like a lump or a crease in a carpet. Carefully smooth your hand over the floor to remove any creases or small blockages to the Shark Robot path.
If you have a wooden, tile, or laminate floor, check for a slight unevenness in the floor. You may need to find some way to level it out if there is. The technical details of leveling out the floor will depend on the floor type and how severe the imperfection is.
By the way, speaking of shark robot vacuums, does it repeatedly return to its charging station? Then you might want to check out our guide on fixing shark robot vacuum that keeps returning to dock.
What If It’s Caught On Some Debris?
Even the best vacuum has things it just can’t brush up and get past. Plastics, metal, and various other items will block up and clog up your Shark Robot vacuum.
If you think it’s a case of loose debris blocking up your bumper, here are some steps to take:
- Move the Shark Robot so that you can brush away or remove any small obstructing objects
- Lift the Shark Robot and shake gently to shake out anything that’s been loosely trapped
- If shaking gives you nothing, tap firmly on the top and the front of the bumper to dislodge anything that might be slightly stuck.
If the steps listed above don’t work, you might have something that’s become tightly wedged under the bumper.
What If I Have Some Debris Wedged Under The Bumper?
If you think there might be something wedged into the bumper, then you’ll need to get it unstuck. The first step is to turn the Shark Robot upside down and see if you can spot the source of the problem.
Trying to pry the debris out can be tempting, but this can damage the brushes, the bumper, or other components. The better option is to remove the bumper and clear the obstruction.
How Do I Remove and Replace the Front Bumper Of The Shark Robot?
A series of small screws generally hold on the bumper of the Shark Robot. The number and size of screws tends to vary slightly based on the model of the Shark Robot.
- Unscrew the screws and place them in a safe place.
- Gently lift away the plastic bumpers.
- Clean away the debris
- Replace the bumpers and screw back in place
- Make sure everything is securely fastened
- Check to see if the problem is resolved.
If this doesn’t fix the problem of the stuck bumper, then there may be another issue involved.
What Should I Do If The Bumper Is Cracked or Broken?
Sometimes, even the most durable household items can crack under regular wear and tear. If that happens to your Shark Robot, then it’s just a matter of making replacements or repairs.
First things first, remove the bumper using the steps listed above.
From there, the easiest thing to do is probably to replace the bumper entirely. For this, you may need to contact the manufacturer.
If you’re not going to completely replace the bumper, you may want to try applying a little bit of super glue. However, this can be trickier than it seems.
If you’re trying to do a fix with superglue, remember the following:
- Find the broken section.
- Determine if you have any missing pieces (broken bumper pieces may have been sucked into the vacuum)
- Apply the superglue and wait for it to set.
- Smooth and shape the superglue to conform to the shape and texture of the original bumper – this will probably require a delicate use of sandpaper.
- Reattach the bumper and make sure there are no issues with the renewed connections
- Check and see if the error is resolved.
A quick fix may not work, and it’s not likely to hold forever, so you may need to replace the bumper sooner or later.
What Should I Do If The Sensors Are Malfunctioning?
If you think the sensors are malfunctioning, the first thing to do is clean them and see if that makes a difference. Sometimes the problem is as simple as a dirty sensor.
To clean a sensor:
- Remove the bumper
- Find the sensors – they’re in different places on different models, so you’ll need to look up the placement for your specific Shark Robot.
- Gently clean the sensors with a soft cloth
- Be sure sensors are fully cleaned
- Reassemble the bumper
- Check to see if the error is resolved
If cleaning the sensors doesn’t work, then they probably need to be replaced. To replace the sensors, you’ll need to contact the manufacturer, and most likely, you’ll need to either send your Shark Robot in for maintenance or replace it completely.
You could also try resetting the shark robot vacuum and see if that fixes the issue. Head over to this guide on how to reset a shark robot vacuum to learn more.
Final Thoughts
If the front bumper appears to be stuck, there are several things you can do to try and fix the problem. Hopefully, with a bit of patience and effort, your Shark and Robot will be working again in no time.
And to discover more problems and fixes related to shark robot vacuums, be sure to check out this shark robot vacuum troubleshooting guide.