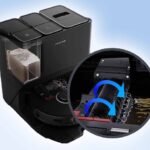
Welcome to a streamlined guide for maintaining your RoboRock Robot Vacuum.
Whether you have the S7 MaxV Ultra or another model in the series, this guide provides essential tips to keep your vacuum in top shape.
Now, I must confess that I occasionally stray from the manufacturer’s timelines for replacing parts. But don’t worry, I will only state the manufacturer-recommended timelines for part replacement.
Efficient maintenance extends your vacuum’s life and ensures peak performance.
Essential Tools for RoboRock Maintenance
These tools will make the maintenance process more efficient and effective. Here’s a list of what you’ll need:
RoboRock Maintenance Tools:
- Small Blade or Scissors: Ideal for cutting and removing hair and debris entangled in the brushes.
- Phillips Head Screwdriver: Necessary for detaching the side brush and accessing certain parts of the vacuum.
- Old Toothbrush: A handy tool for scrubbing small, hard-to-reach areas, especially around sensors and in tight spaces.
- Soft Rag or Cloth: Useful for wiping down surfaces and cleaning delicate parts of the vacuum without causing damage.
- Mild Non-Corrosive Detergent: Occasionally needed for stubborn grime. It’s important to use a detergent that is safe for electronic devices to avoid causing any damage.
Optional Tools: - Jet Fan: This can blow out dust from hard-to-reach internal areas. It’s especially useful for cleaning out fine particles that a cloth can’t reach.
- Handheld Vacuum: This helps quickly clean up debris removed from the vacuum parts during maintenance. It’s convenient for collecting loose dirt and hair.
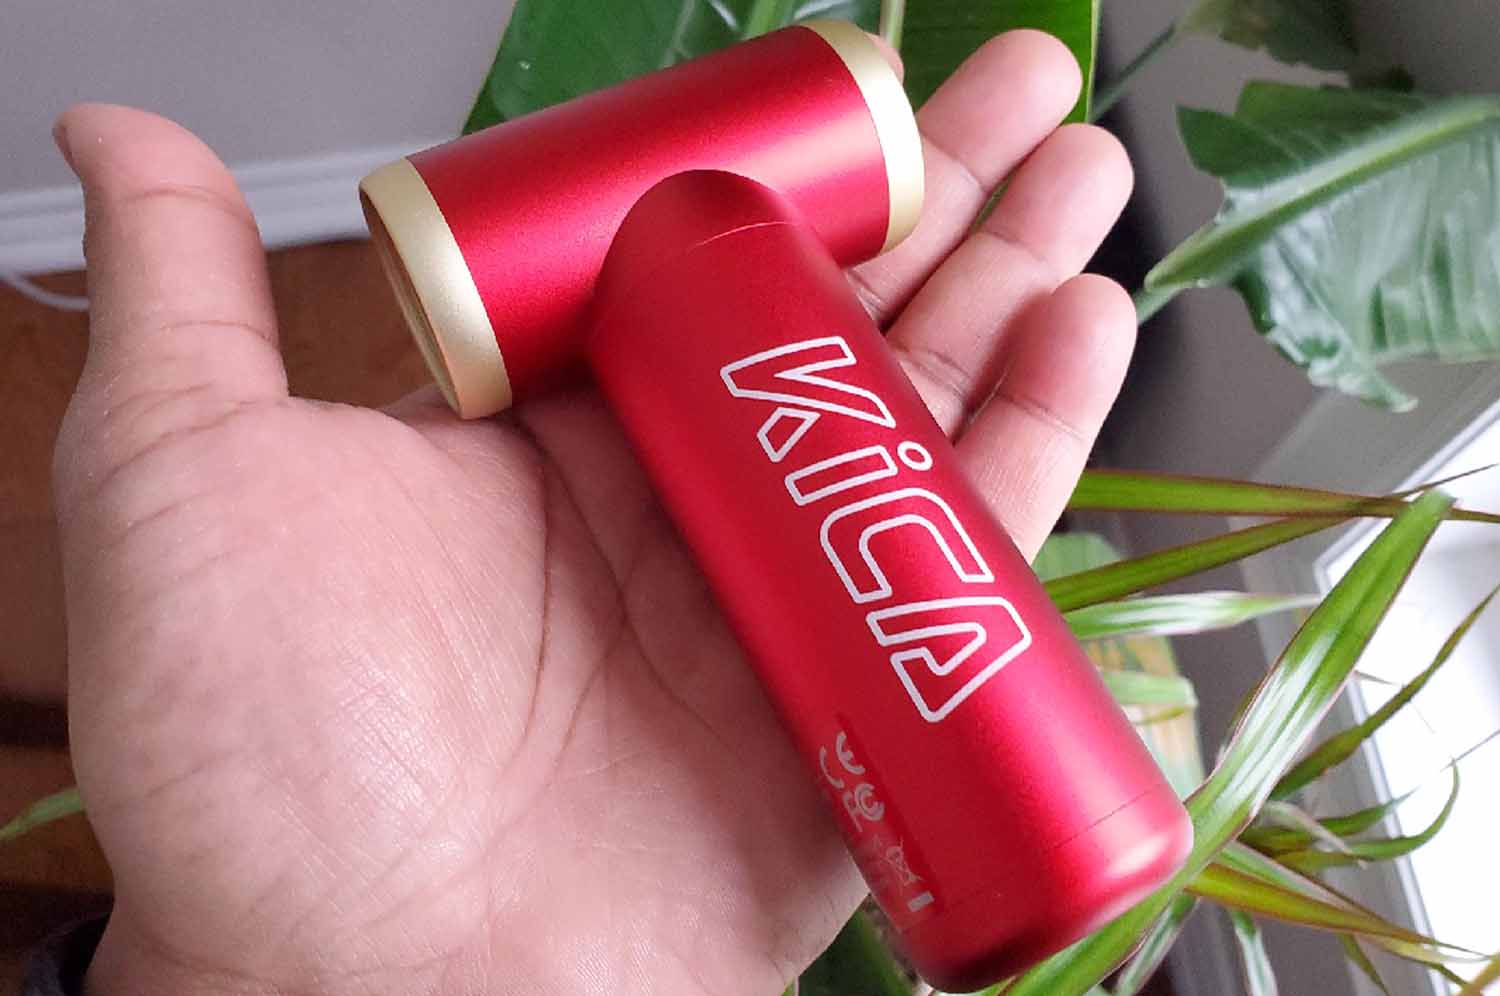
Kica Jet Fan
With these tools, you’ll be well-prepared to undertake regular maintenance tasks and ensure that your RoboRock Robot Vacuum operates efficiently and effectively.
1. Dustbin and Filter Maintenance: Essential for Peak Performance
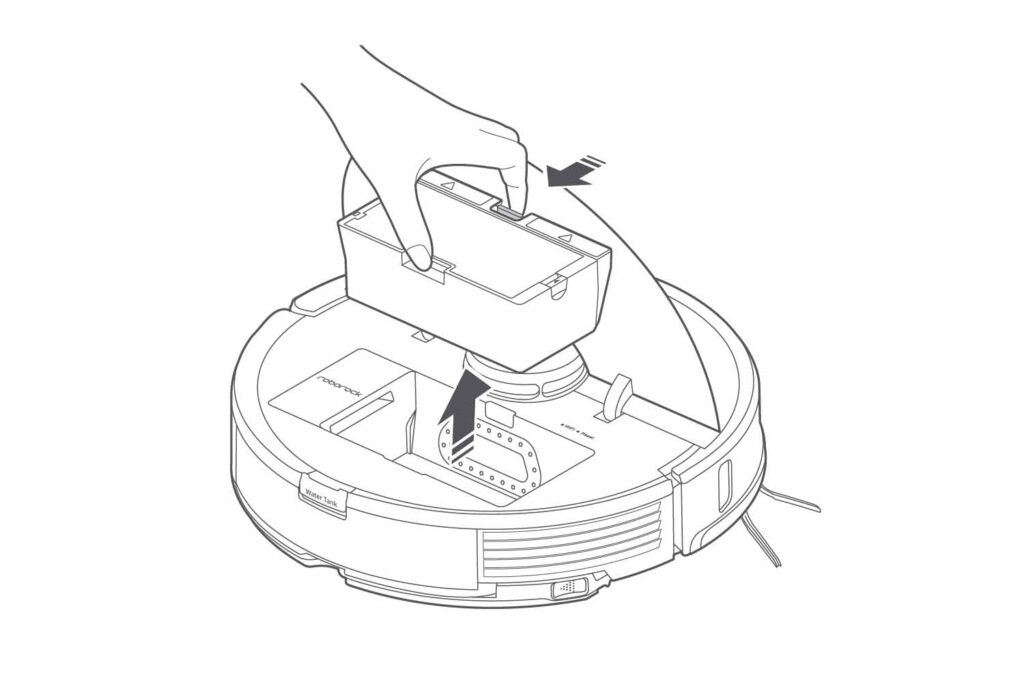
Subheading: Optimize Your Vacuum’s Efficiency with Regular Filter Care
Dustbin & Filter Maintenance Table:
| Task | Frequency | Notes |
|---|---|---|
| Filter Cleaning | Every 2 Weeks | Rinse and Tap to Remove Dust |
| Filter Replacement | Every 3-6 Months or 150 Hours of Use | Replace with Compatible Filter |
| Dustbin Rinse | With Filter Cleaning | Dry Completely Before Reassembly |
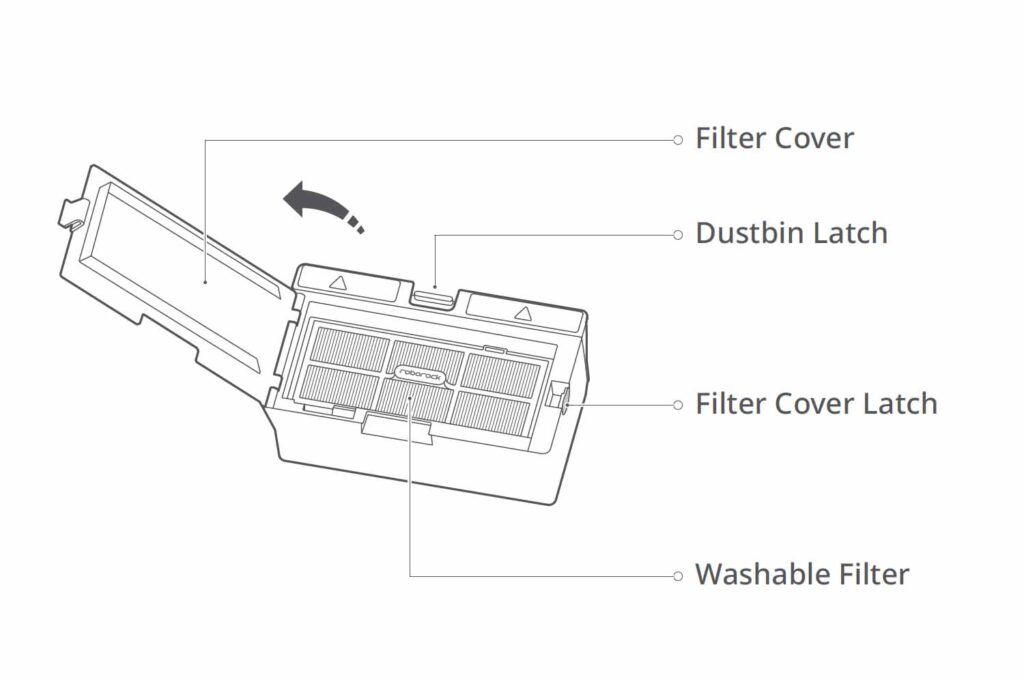
- Filter Removal: Carefully remove the filter from the dustbin.
- Rinse the Filter: Hold the filter under running water, gently tapping its edges to dislodge trapped dust and debris.
- Clean the Dustbin: Rinse the dustbin to remove any residual debris, ensuring a thorough clean.
- Dry Thoroughly: Allow both the filter and dustbin to dry completely before reassembling. This prevents moisture from damaging the vacuum’s internal components.
2. Main Brush Maintenance: Ensuring Optimal Cleaning Performance

Subheading: Maintain Your Vacuum’s Main Brush for Enhanced Cleaning
Main Brush Maintenance Table:
| Task | Frequency | Notes |
|---|---|---|
| Main Brush Cleaning | Every 2 Weeks | Remove Debris from Bristles |
| Main Brush Replacement | Every 6-12 Months or 300 Hours of Use | Check for Bristle Wear |
- Accessing the Brush: Flip the vacuum to access the underside and open the panel securing the main brush.
- Panel Cleaning: Wipe the panel with a damp cloth to remove any accumulated dirt.
- Brush Removal: Carefully extract the main brush from its housing.
- Clean the Brush: Thoroughly clean between the brush’s bristles to remove all trapped dirt and hair.
- Reassembly: Reinsert the brush into its housing once it is clean and dry, ensuring proper alignment for effective operation.
If you have an S7 or S8, check out these critical tips for your high-speed maintenance brush.
3. Brush Axle Cleaning: Ensuring Smooth Operation
Subheading: Maximize Efficiency with Clean Brush Axles
Brush Axle Maintenance Steps:
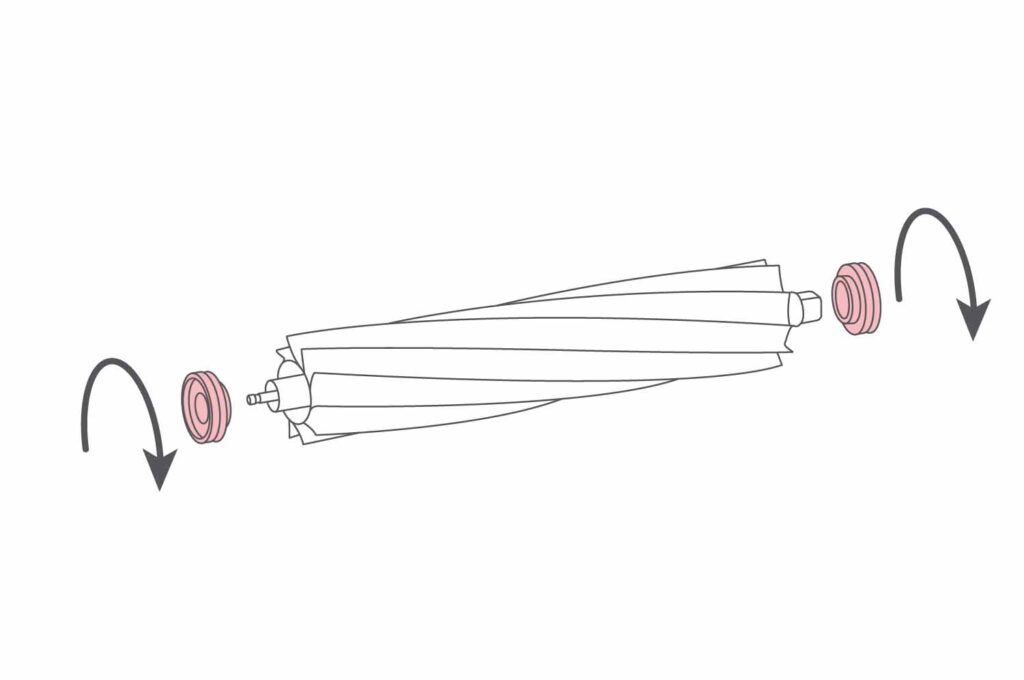
- End Cap Removal: Locate the grey round end caps on the brush. Twist them slightly to remove them, revealing the brush axle.
- Debris Removal: Carefully clear any tangled hair, fibers, or debris from the axle. This process is vital to prevent the brush from getting stuck or operating inefficiently.
- End Cap and Bearing Cleaning: Flip the brush and repeat the cleaning process for the other end cap and bearing.
- Reassembly Tips: After cleaning, ensure that the brush and its components are dry. Align the arrow marking on the grey end cap with the lock/unlock symbol on the axle for correct reassembly.
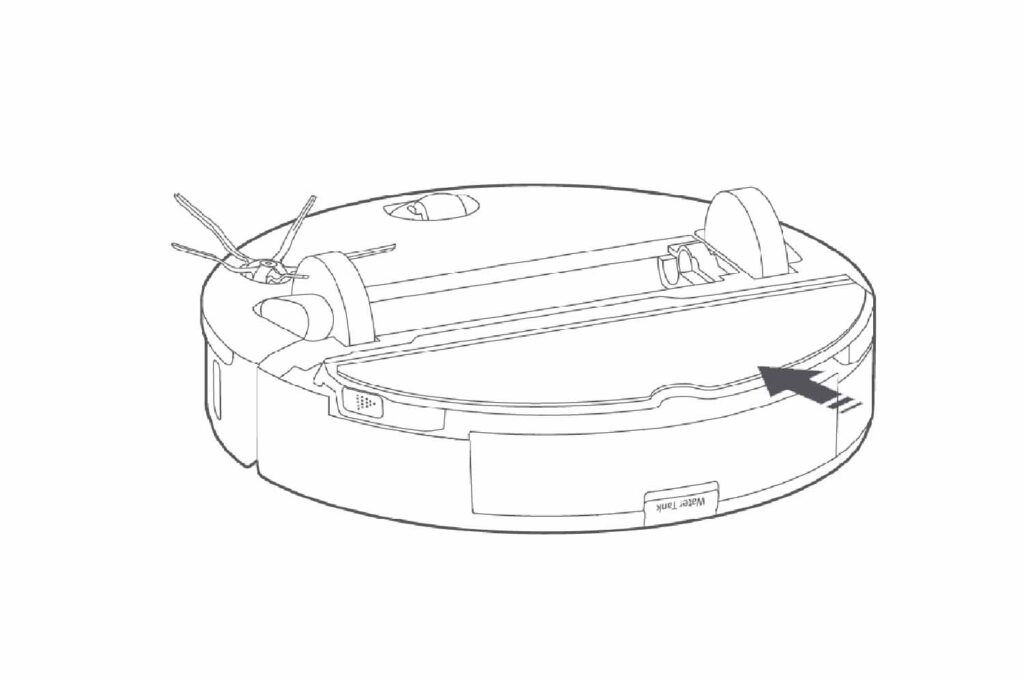
- Housing Wipe Down: Clean the brush housing with a dry cloth before reinserting the brush.
- Correct Brush Placement: Align the square-shaped end of the brush with the right-hand side of the housing, ensuring it fits correctly.
- Cover Replacement: Replace the clean cover, making sure the fins are facing the center wheel, and securely latch the cover back in place.
4. Side Brush Care: Essential for Edge Cleaning
Subheading: Keep Your Vacuum’s Side Brush in Top Shape
Side Brush Maintenance Table:
| Task | Frequency | Notes |
|---|---|---|
| Side Brush Cleaning | Monthly | Remove Tangled Hair and Dust |
| Side Brush Replacement | Every 3-6 Months or 200 Hours of Use | Ensure Proper Attachment |
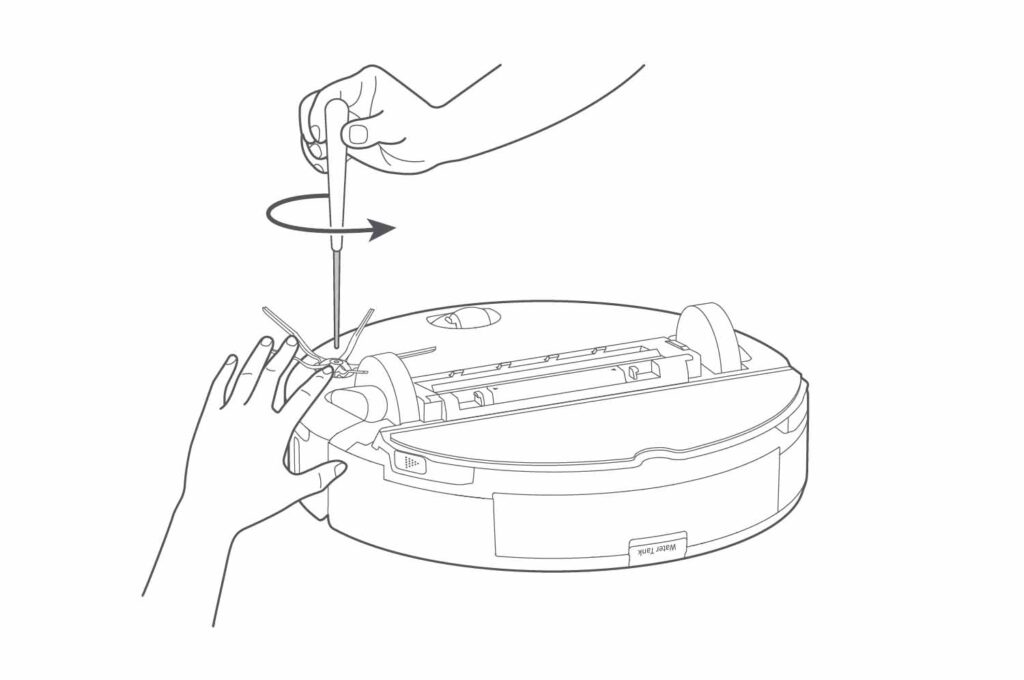
- Removing the Brush: Use a Phillips head screwdriver to unscrew the single screw holding the brush in place. Secure the brush with your other hand to prevent it from spinning.
- Cleaning the Brush: Once removed, clear any tangled hair, fibers, or dust accumulated around the brush. This helps maintain its effectiveness in reaching those tricky corners and edges.
- Reattaching the Brush: After cleaning, reattach the brush securely, ensuring it is properly aligned and fixed. This is important for the brush to function correctly and efficiently.
5. Mop Cloth Handling: Maintaining Your Vacuum’s Mopping Feature
Subheading: Effective Mop Cloth Maintenance for Optimal Cleaning
If your RoboRock model comes equipped with a mopping feature, proper care of the mop cloth is essential.
Keeping the mop cloth clean not only ensures efficient cleaning but also extends its lifespan, making your vacuum more effective in dealing with different floor types.
Mop Cloth Maintenance Table:
| Task | Frequency | Notes |
|---|---|---|
| Mop Cloth Cleaning | After Every Use | Remove and Wash |
| Mop Cloth Replacement | Every 3-6 Months | Check for Wear and Efficiency |
Follow these steps for mop cloth maintenance:
- Removing the Mop Mount: Press the tabs on either side of the mop mount and slide it backward to remove it from the vacuum.
- Detaching the Mop Cloth: Carefully detach the pad from the Velcro. Be mindful of the vibrating part of the mount, which requires gentle handling.
- Washing the Mop Cloth: Wash the pad in a regular cloth wash cycle in your washing machine. This ensures it is thoroughly clean and free from dirt and debris.
- Reattaching the Mop Cloth: To reattach, slide the cloth into the groove on the mount and press it onto the Velcro. Ensure it is securely attached for effective mopping.
6. Sensor Cleaning: Ensuring Accurate Navigation and Performance
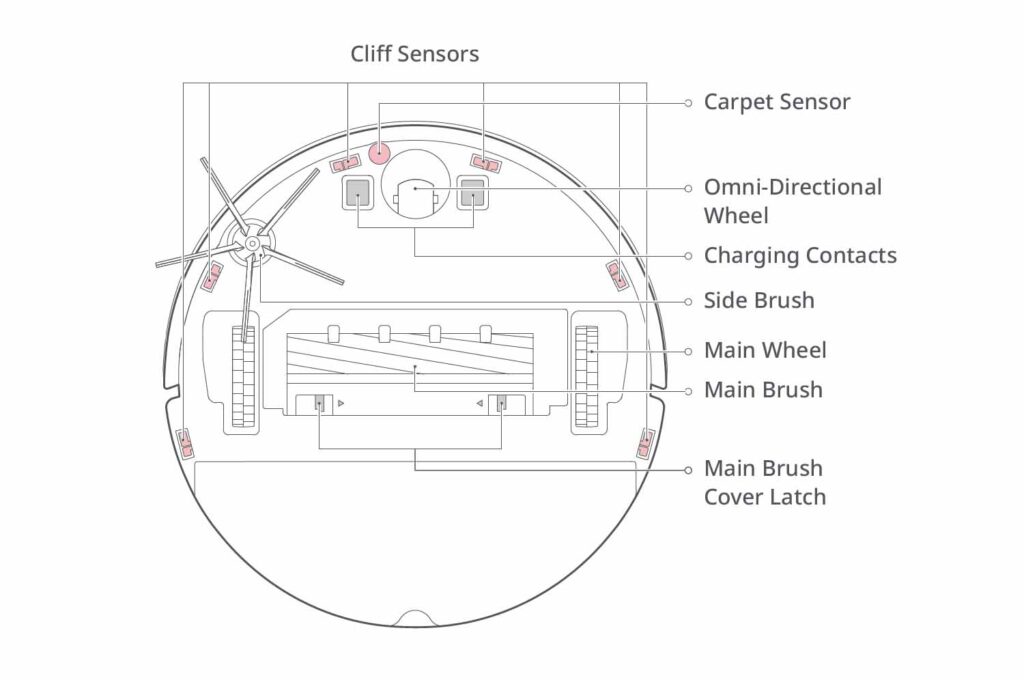
Subheading: Keep Your Vacuum’s Sensors Clean for Optimal Functionality
Sensor maintenance is an often overlooked but critical aspect of keeping your RoboRock Robot Vacuum performing at its best.
These sensors are your vacuum’s eyes and ears, guiding it through your home and enabling it to avoid obstacles, detect dirt, and dock for charging.
They are pretty easy to identify. They look like tiny windows on the bottom of your robot vacuum.
Sensor Cleaning Schedule:
| Sensor Type | Cleaning Frequency | Notes |
|---|---|---|
| Various Sensors (Dock, Wall, Carpet, Cliff) | Every 30 Hours of Use or Monthly | Use a Soft, Dry Cloth |
| Charging Contacts (Vacuum and Dock) | Monthly | Gentle Wipe to Maintain Good Connection |
- Identifying Sensors: Locate the various sensors on your vacuum. These include the dock sensor at the front, the wall sensor on the side, the carpet sensor (if equipped), and the six cliff sensors.
- Cleaning Process: Gently wipe all sensors with a soft, dry cloth. Be careful not to apply too much pressure, as the sensors are delicate.
- Charging Contacts: Also, clean the charging contacts on both the vacuum and the dock. This ensures a good connection and efficient charging.
- Post-Cleaning: After cleaning, inform the vacuum’s app (if applicable) to reset the maintenance countdown. This helps keep track of when the next cleaning is due.