You mop your floor expecting it to be sparkling clean, but no matter how often you go over it, it just doesn’t seem to stay clean. Sounds familiar?
I used to have this issue in one of my rentals, so I devised a technique for eliminating stubborn dirt on the floors.
Key Takeaways:
Dirty mops, too much cleaner, hard water, wrong mops, skipping areas, outdoor pollution, and not vacuuming first can all cause floors to stay dirty despite mopping. Use clean water, suitable mops, scrub hidden areas, and vacuum thoroughly before mopping for clean floors.
In this post, we’ll explain the top 12 reasons why your floor remains a dirt magnet, even after a thorough mop, and provide you with practical fixes. Ready? Let’s dive in!
Why Floor Stays Dirty Despite Regular Mopping (With Fixes!)
Reason #1. Dirty Mop and Bucket
SOLUTION: Wash or replace your mop regularly and clean the bucket before each use.
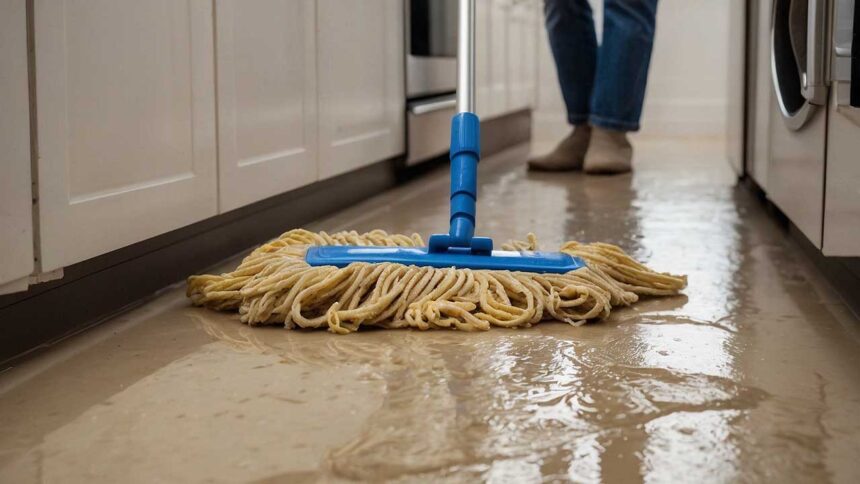
If you’re using a dirty mop or a bucket with dirty water, you’re just spreading the grime around.
For a good clean, you might use a two-bucket system—one for the cleaning SOLUTION and the other for rinsing your mop.
Reason #2. Residue from Previous Cleaners
SOLUTION: Use a neutral floor cleaner designed for your floor type.
Sometimes, the residue from other cleaning products can build up over time and attract more dirt.
In fact, this is one of the most common reasons why the floor remains dirty despite constant mopping.
If you suspect this is the case, you may need to do a deep clean or use a product specifically designed to remove waxy or oily buildups.
For instance, Zep Neutral Floor Cleaner and The Fabulosa Professional are some of the best floor cleaners.
Experiment with different cleaners to find the most effective one for your floor.
Steam mops and high-quality microfiber mops can be more efficient at trapping and removing dirt.
If your current cleaning solution isn’t cutting it, consider switching to a product that’s designed for your specific floor type or a stronger homemade solution.
Now, for those who use tech-savvy cleaning solutions like a Roborock, you might wonder if any cleaning solution can be used in such devices.
It’s crucial to use only compatible cleaners to avoid damaging your sophisticated cleaning gadgets. Find out more about what cleaning solution is safe to use in your Roborock.
Reason #3. Using Too Much Cleaning Solution
SOLUTION: Dilute your cleaning product according to the instructions—usually a couple of capfuls per gallon of water is plenty.
Using too much cleaner can leave a residue that attracts more dirt. After mopping with the solution, go over the floor with just water to rinse off any leftover cleaner.
Reason #4. Not Sweeping or Vacuuming First
SOLUTION: Always sweep or vacuum the floor thoroughly before mopping. This removes the top layer of dust and debris, allowing the mop to tackle the stuck-on dirt more effectively.
Make it a habit to sweep every day and mop afterward for the best results.
Vacuuming before mopping is essential.
Reason #5. Hard Water Stains
SOLUTION: If you have hard water, minerals can be left behind and create a film on the floor.
Use distilled water for mopping or add a small amount of vinegar to the mop water to counteract the mineral deposits.
Just a half-cup of vinegar per gallon of water can work.
Reason #6. Wrong Mop Type
SOLUTION: Choose a mop that’s suitable for your floor type.
Microfiber mops work well for many surfaces, absorbing dirt and leaving fewer streaks.
| Floor Type | Recommended Mop Type | Mop Type to Avoid |
| Hardwood | Microfiber flat mop | String mops with excess water |
| Laminate | Microfiber or spray mop | Wet string mops, steam mops |
| Vinyl | Spin mop or microfiber mop | String mops, heavy water use |
| Ceramic or Porcelain Tile | Microfiber or steam mop | Sponge mops (can leave residue) |
| Stone Tile | Microfiber or steam mop | Sponge mops, too much water |
| Linoleum | Sponge mop or microfiber mop | Abrasive mops, excessive water |
| Concrete | String mop or microfiber mop | Sponge mops (not as effective) |
| Bamboo | Soft microfiber mop | Wet mops, harsh chemicals |
Reason #7. Too Much Water on the Mop
SOLUTION: Wring out your mop thoroughly so it’s damp, not dripping wet.
Excess water doesn’t just take longer to dry—it can also spread dirt around and seep into crevices, loosening grime that ends up back on the surface.
Reason #8. Skipping Sections While Mopping
SOLUTION: Mop your floor in sections, making sure to overlap each stroke for even cleaning.
Don’t skip areas, even if they look clean, as dirt can be invisible but still present.
Work from one side of the room to the other to cover the entire floor systematically.
Reason #9. Dirty Cleaning Water
SOLUTION: Change your mop water as soon as it looks dirty.
Dirty water = dirty floor.
Depending on the size of the area and the level of dirt, you might need to change it a few times during a single cleaning session.
Reason #10. Not Allowing Floors to Dry
SOLUTION: Let the floor air dry completely before walking on it again, or dry it with a clean, dry towel.
Walking on floors too soon can cause new dirt to stick to the surface, especially if your shoes are dirty.
Reason #11: Not Getting into Crevices
SOLUTION: Use small handheld scrub brushes for those hard-to-reach areas.
Pay special attention to corners, baseboards, and grout lines where dirt likes to hide.
For grout, you might need a specialized cleaner and a bit of elbow grease to get it looking clean.
Maintaining clean floors can be a challenge, especially when you have pets that shed or bring in dirt. To keep your baseboards dust and paw-free, take a look at our guide on how to keep baseboards clean with dogs around.
Reason #12: Pollution From Outside Environment
SOLUTION: If you live in an area with a lot of outdoor pollution from dusty roads, railways, or industrial activity, this pollution can find its way inside and settle on your floors.
Keep windows and doors closed on days when the outdoor air quality is poor.
Use air purifiers in the home to filter out dust and particulate matter.
Also, place heavy-duty doormats at all entrances and encourage people to wipe their feet thoroughly.
Furthermore, consider investing in higher-quality window and door seals to prevent dust from seeping in.
To stop your floors from making your feet black and ensure they’re truly clean, check out our tips for a deeper clean that leaves no residue behind.
How To Prevent Floors From Becoming Dirty
- Place high-quality mats outside and rugs inside your entryways to catch dirt and moisture from shoes and pet paws.
- Encourage family members and guests to wipe their feet or, better yet, remove their shoes upon entering.
- Keep pets in a designated clean area or room while the floors dry. If possible, schedule your floor cleaning at a time when pets can be outside or otherwise occupied, minimizing the chance of them bringing dirt back onto the clean floors.
- Rinse your mop thoroughly after each use to ensure you’re not leaving behind residue on your floors.
- Use a vacuum instead of a broom to pick up the finer particles of dirt, pet hair, and crumbs before you mop. This is especially helpful on hardwood and tile floors.
- Focus your cleaning efforts on high-traffic areas like kitchens and entryways more frequently. This may mean daily spot cleaning or section mopping to keep these areas in good shape, instead of waiting to do the whole floor.
- If you’re not getting the results you want with a traditional string mop, consider a steam mop or spin mop. These tools can offer a more thorough clean and are often easier to use. A microfiber spin mop, for example, can be effective for both applying clean water and for drying floors.
For those who use Swiffer WetJets, facing issues with the spray can be frustrating. If your Swiffer WetJet is not spraying, we’ve got some easy troubleshooting tips and fixes to help you ensure your floors get cleaned properly.
Conclusion: One More Essential Takeaway!
So now you know how to keep your floors clean.
In homes with pets or lots of foot traffic, daily vacuuming might be necessary. Make sure you’re reaching under furniture and along edges where dust and hair tend to accumulate.
And lastly, it’s essential to keep realistic expectations. You may not achieve 100% cleaning perfection, especially if you have pets and kids at home.
So that’s it! Hope you found this guide helpful.
Pro-Tip: Keep an eye on our blog because we have lots of cleaning and vacuuming tips coming your way very soon. Stay tuned!


