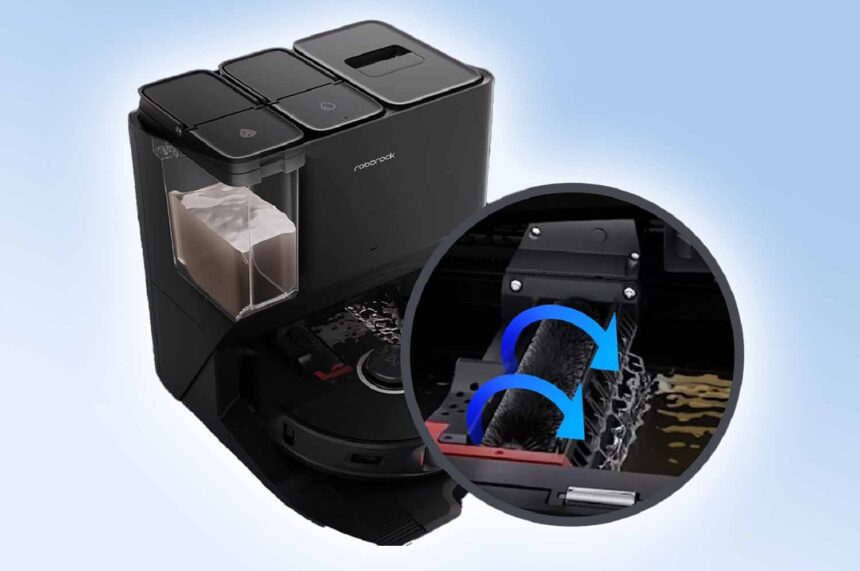
Robotic vacuums like the Roborock S8 Pro Ultra, S7 Max Ultra, and S7 MaxV Ultra have become essential for efficient and convenient hands-free home cleaning.
However, they can occasionally run into issues, one of the most common being the “High-Speed Maintenance brush jammed” error. This guide provides a detailed approach to resolving this problem.
Understanding the Brush Jam Error in Roborock
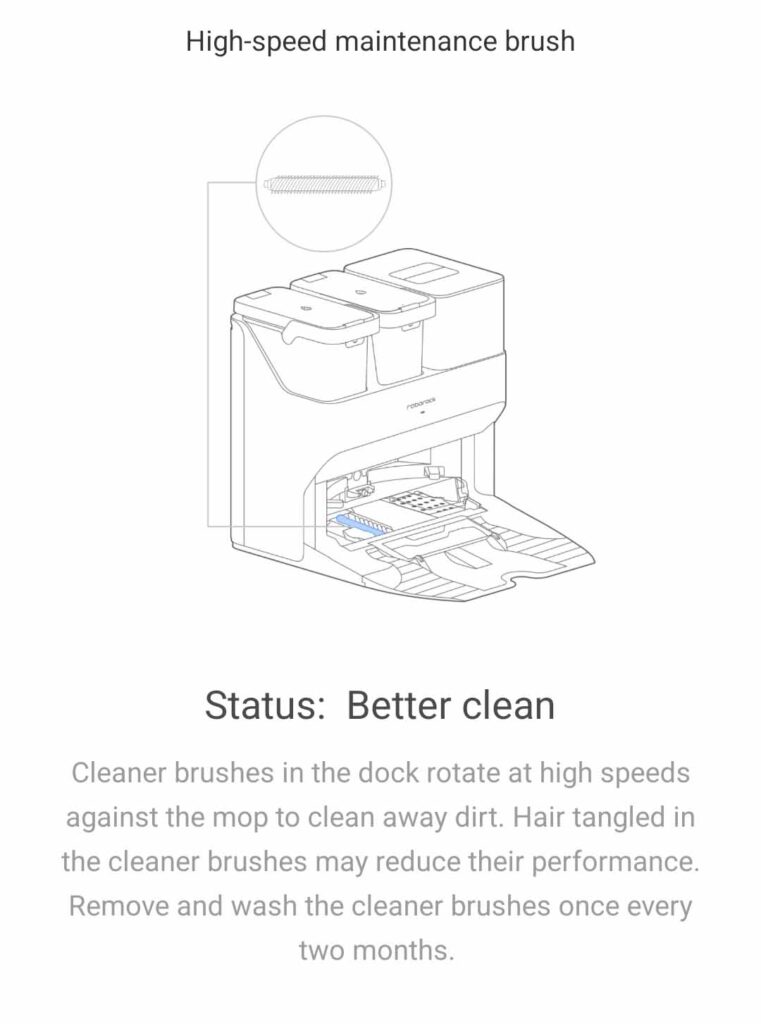
The brush jam error typically occurs when the brush assembly, which is integral to the cleaning process of both the dock and the vacuum, encounters an obstruction.
This could be due to accumulated debris, tangled hair, or even small objects.
Step-by-Step Guide to Fixing the Brush Jam
Inspect and Clean the Brush Assembly
The first step is to inspect the brush assembly thoroughly. Any visible debris or blockages should be removed. A detailed cleaning can often resolve the issue. You may encounter a build of hair and sludge.
For more comprehensive cleaning tips, consider this Roborock robot vacuum maintenance guide.
Clean the Tracks and Surrounding Area
Debris often accumulates in the tracks where the brush assembly slides. Thoroughly cleaning these tracks with a paper towel or a soft cloth is essential. Once again, this area can accumulate debris and sludge.
Reseat the Mop and Filter
Ensuring the mop pad and filter are correctly installed is crucial, as misalignment can lead to brush jams. Understanding the proper installation is crucial.
Check for Hidden Obstructions
Sometimes, the cause of the jam is not immediately visible.
In some instances, hidden debris, such as carpet fluff, large pieces of debris, or even small kids’ toys, can obstruct the brush’s movement.
Examining every part of the brush assembly for such hidden obstructions is essential.
Test the Mechanism
After cleaning and reassembly, manually testing the brush assembly is vital.
Ensure it can move freely across the entire track to confirm that the issue has been resolved.
Examine the Electrical Components
In rare cases, the problem may be electrical, such as a break in the wire powering the cleaner brush motor.
If electrical issues are suspected, consulting a professional or contacting the manufacturer may be necessary.
Check out my full cleaning & maintenance guide for S8, S7, S6, S5, S4 & E series here
Table 1: Troubleshooting Steps and Their Effectiveness
| Troubleshooting Step | Effectiveness |
|---|---|
| Cleaning brush assembly | High |
| Cleaning and reseating mop pad | Moderate |
| Cleaning tracks | High |
| Checking for hidden obstructions | High |
| Manual testing of the mechanism | High |
| Electrical component check | Low (Case Specific) |
Replacement Parts
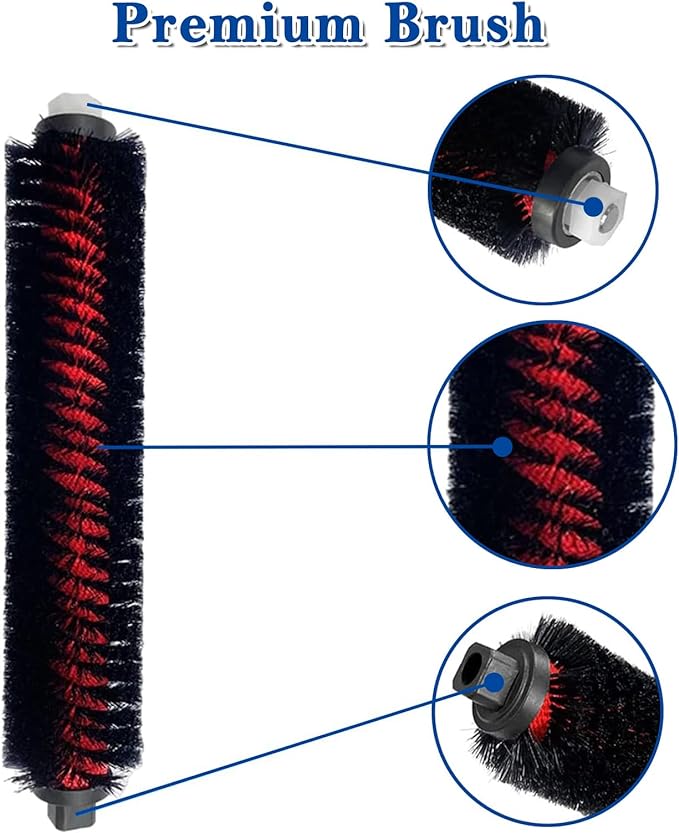
Preventive Measures and Maintenance Tips for Roborock
Regular maintenance and preventive measures are vital to avoiding future brush jam issues and ensuring the longevity of your Roborock vacuum.
Here’s what you need to know:
Regular Cleaning of the Brush Assembly
Frequent cleaning of the brush assembly is crucial. Remove and clean the brush regularly to prevent the accumulation of hair, dust, and debris. Roborock recommends that the High-Speed Maintenance brush should be cleaned every two months to keep it performing well.
Track and Filter Maintenance
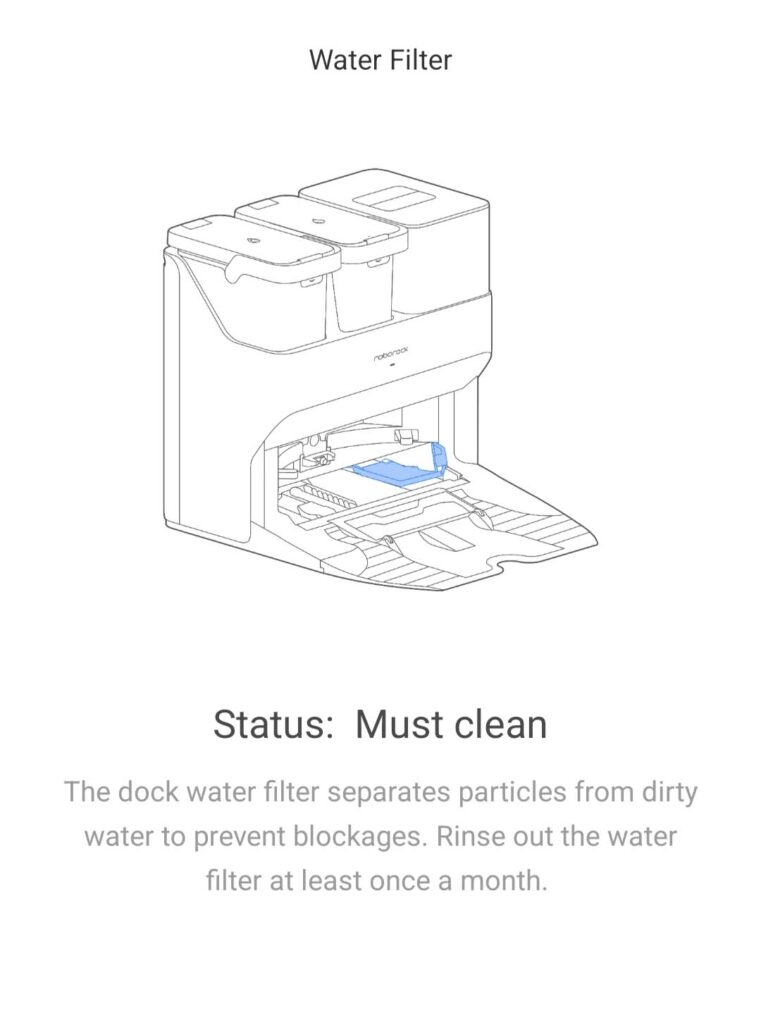
Since brush assembly, track, and filter maintenance are all in the same area, cleaning everything makes sense.
Keep the tracks clean and clear of debris. Also, ensure the filter is regularly cleaned or replaced as per the manufacturer’s recommendations. Roborock recommends doing this at least once a month.
A clogged filter can affect the vacuum’s efficiency and lead to errors.
Periodic Inspection of Electrical Components
Although less common, electrical issues can cause brush jams. Periodically inspecting the wiring and connections can preemptively address these problems.
If you’re unsure, consult a professional or refer to Roborock’s customer support.
Avoid Overloading the Vacuum
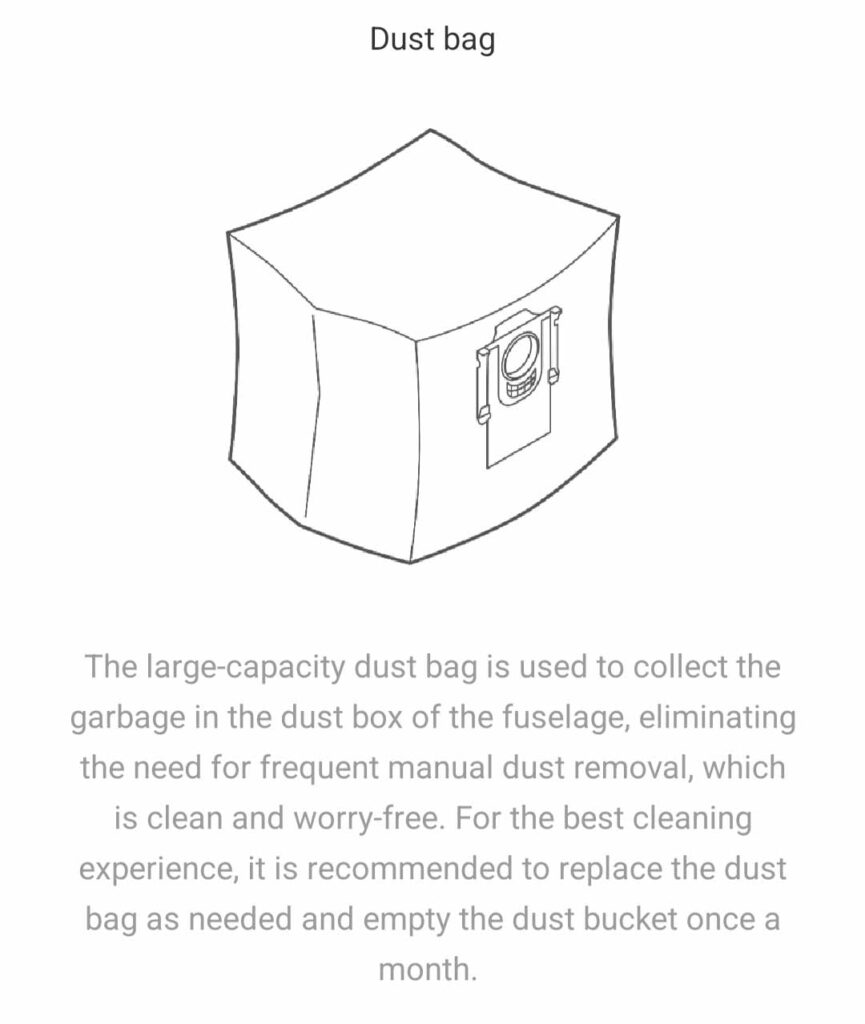
Be mindful of the vacuum’s capacity. Overloading it with debris or large objects can cause jams. To maintain optimal performance, regularly change the vacuum’s dustbag when needed.
Here are a few things I’ve learned from my owning a Roborock S7 MaxV ultra. One sign to look out for is debris left behind in your robot vacuum plastic dust bin. If your dock dustbin has too much debris, the dock will have trouble sucking the debris out of your robot vacuum.
Use of Appropriate Settings
Use the appropriate settings that best suit your floor type. This will enhance cleaning efficiency and reduce the risk of jams. Explore the features of your Roborock in this in-depth review.
Table 2: Preventive Measures for Roborock Maintenance
| Preventive Measure | Importance |
|---|---|
| Regular cleaning of the brush | High |
| Track and filter maintenance | High |
| Inspection of electrical components | Moderate |
| Avoiding overloading | High |
| Using appropriate settings | High |
Maintaining your Roborock vacuum can significantly reduce the likelihood of encountering the brush jam error. Regular care and preventive measures ensure that your robotic vacuum continues to operate efficiently, keeping your home clean with minimal effort.
Troubleshooting Common Roborock Errors and Enhancing Performance
In addition to resolving the brush jam issue, it’s beneficial to understand how to troubleshoot other common errors and enhance the overall performance of your Roborock vacuum.
Understanding Error Codes
Roborock vacuums display specific error codes for various issues. Familiarize yourself with these codes, which are often detailed in the user manual. This knowledge can help you quickly diagnose and address problems.
Here is the organized table for the robot vacuum cleaner error codes, their descriptions, and the recommended solutions:
| Error Code | Description | Solution |
|---|---|---|
| Error 1 | LiDAR turret or laser blocked. Check for obstruction and retry. | Check for obstruction and retry. |
| Error 2 | Bumper stuck. Clean it and lightly tap to release it. | Clean and lightly tap to release. |
| Error 3 | Wheels suspended. Move robot and restart. | Move robot and restart. |
| Error 4 | Cliff sensor error. Clean cliff sensors, move robot away from drops and restart. | Clean sensors, move robot, and restart. |
| Error 5 | Main brush jammed. Clean main brush and bearings. | Clean main brush and bearings. |
| Error 6 | Side brush jammed. Remove and clean side brush. | Remove and clean side brush. |
| Error 7 | Wheels jammed. Move the robot and restart. | Move robot and restart. |
| Error 8 | Robot trapped. Clear obstacles surrounding robot. | Clear obstacles. |
| Error 9 | No dustbin. Install dustbin and filter. | Install dustbin and filter. |
| Error 12 | Low battery. Recharge and retry. | Recharge battery. |
| Error 13 | Charging error. Clean charging contacts and retry. | Clean charging contacts and retry. |
| Error 14 | Battery error. | Check battery. |
| Error 15 | Wall sensor dirty. Clean wall sensor. | Clean wall sensor. |
| Error 16 | Robot tilted. Move to level ground and restart. | Move to level ground and restart. |
| Error 17 | Side brush error. Reset robot. | Reset robot. |
| Error 18 | Fan error. Reset robot. | Reset robot. |
| Error 21 | Vertical bumper pressed. Move robot and retry. | Move robot and retry. |
| Error 22 | Dock locator error. Clean and retry. | Clean and retry. |
| Error 23 | Could not return to dock. Clean dock location beacon and retry. | Clean dock beacon and retry. |
| Error 27 | VibraRise system jammed. Check for obstructions. | Check for obstructions. |
| Error 28 | Move the robot from the area. | Move robot to floor and retry. |
| Filter blocked or wet | Clean, dry, and retry. | Clean, dry, and retry. |
| No-go zone or Invisible Wall detected | Move robot from this area. | Move robot from area. |
| Cannot cross carpet | Move robot across carpet and restart. | Move robot across carpet and restart. |
| Internal error | Reset the robot. | Reset robot. |
Optimizing Vacuum Settings
Make the most of your vacuum’s features by optimizing its settings for your specific needs. Adjust suction power, cleaning schedules, and no-go zones for an efficient cleaning experience. Discover more about optimizing your vacuum in this comprehensive guide.
Firmware Updates
Regularly update your vacuum’s firmware. Updates often include bug fixes, new features, and performance improvements. Keeping your device up-to-date ensures the best possible operation.
Battery Care and Replacement
Battery health is crucial for optimal performance. Follow the manufacturer’s guidelines for charging and storing the vacuum. If you notice a decline in battery life, consider replacing it as discussed in these power-boosting tips.
When to Seek Professional Help
If you encounter persistent issues or complex technical problems, seeking professional help or contacting Roborock support is advisable.
Table 3: Enhancing Roborock Performance
| Enhancement Strategy | Benefit |
|---|---|
| Understanding error codes | Quick troubleshooting |
| Optimizing vacuum settings | Tailored cleaning experience |
| Regular firmware updates | Improved functionality |
| Battery care and replacement | Prolonged device life |
| Seeking professional help | Reliable solutions |
By adopting these troubleshooting and maintenance strategies, you can significantly enhance the performance and longevity of your Roborock vacuum.
Regular care, coupled with understanding how to address common issues effectively, will ensure that your robotic vacuum remains a valuable asset in your home cleaning arsenal.
This concludes our comprehensive guide on fixing the Roborock dock maintenance brush jam and maintaining your robotic vacuum. If you have any further questions or need more information, please feel free to reach out.


