Have you ever found that your weekly vacuuming routine leaves marks, scuffs, stains, or even worse – chips on your baseboards at home or in the office? If so, you’re not alone.
Conventional vacuum cleaners are big, bulky items, and if you combine that with the fact that most people just want to get this chore over and done with, there are bound to be a few occasions where the vacuum gets knocked into furniture and walls.
And in this case, baseboards are usually one of the first ones to get the brunt of it.
It’s simple to say that we should all just vacuum gentler.
However, because modern conventional vacuums come in all shapes and sizes, some of their form factors make it difficult for some people to use them ergonomically, especially those who aren’t very strong due to old age or disability.
When it comes to walls, it is worth noting that vacuums may potentially cause permanent dings or scratch your baseboards if you’re not careful!
Here are some quick hacks that you can use to prevent your vacuuming routine from scuffing or chipping your walls and baseboards, keeping them clean and looking just as new as the day you got them installed.
Quick solution:
A simple solution to prevent vacuums from leaving scratch marks on your baseboards is by applying rubber strips, rubber bumpers, or felt patches along the base of your vacuum head.
LATEST VIDEOS
Although I found the solution above extremely effective below, I’ve listed several more solutions and went into more detail on the solutions listed directly above.
Stick felt patches on your vacuum head
If your baseboards are looking a little worse for wear due to constant impact with the vacuum head, there is at least one factor you can control to reduce the impact – by installing felt pads on the vacuum head itself.
The shape of your vacuum head may vary from manufacturer to manufacturer, but the principle is the same.
Focus on the areas around the front and side of the vacuum head, and especially along the corners.
By doing this little hack, you prevent your vacuum head from scuffing or scratching your baseboards, even with a hard impact.
You can usually get felt patches at your nearest hardware store or your local supermarket.
Use rubber strips or bumpers
Rubber strips or rubber bumpers will help to reduce the impact the same way felt pads do.
The upside is you can get these in a transparent color, meaning that you can maintain the color scheme of your vacuum cleaner without having to deal with the unsightly felt pads, which usually come in black – unless of course, your vacuum head is black as well.
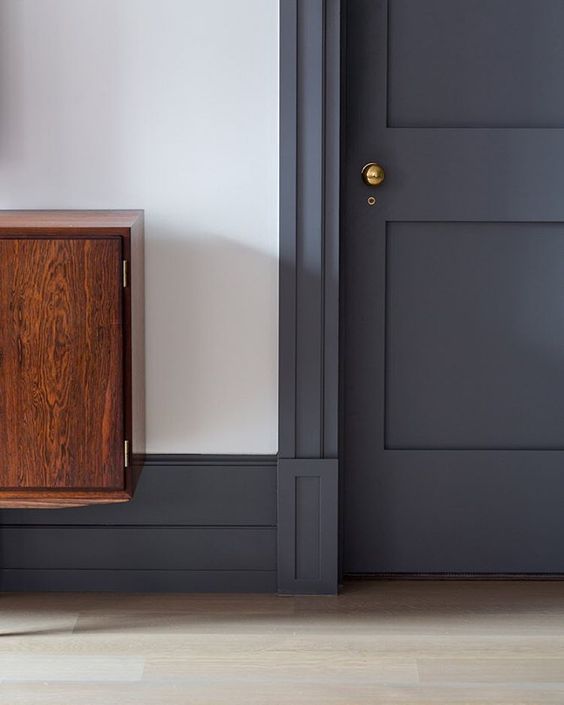
Consider darker baseboard colors
This hack takes a little bit more work – if you’ve already got baseboards in your house, changing them to a darker-colored version will make the stains less noticeable.
Keep in mind that this would only feasibly work if you’ve just moved into a new place or you’re planning a major makeover of your home.
It’s something worth thinking about if you don’t want to go through the hassle of having stains on your baseboard.
I’ve seen many modern homes that use darker color paint on baseboards, and it looks fantastic!
Keep your vacuum head clean
Keeping your vacuum head clean is an essential part of maintenance for your vacuum cleaner.
Because it goes through so much dust, dirt, and debris, and it goes into the deepest corners, and under furniture, your vacuum head definitely gets dirtier each time you use it – and this dirt is easily transferred to your baseboards upon impact.
Use a wet cloth and some warm soapy water to wipe down all parts of your vacuum cleaner head after every couple of uses in order to keep it clean and reduce the risk of dirtying your baseboards when vacuuming.
Use a more durable paint
For a more heavy-duty fix to this issue, consider painting your baseboards with scuff-resistant paint.
These paints are industrial quality and are used in commercial buildings with high foot traffic – meaning that they will be more than enough to withstand impacts from the vacuum head cleaner for a couple of years.
Control your vacuuming
This is one of the simplest hacks to do – simply be more conscious when doing your vacuuming, and when you’re coming close to your baseboards, control your vacuuming intensity to ensure that you’re not banging into the baseboards with your vacuum head.
Sweep up along walls with a broom first
If you have access to a broom, use it to sweep up the areas along your baseboards first and gather the dust and debris away from the baseboards before using the vacuum to suction up. This keeps your vacuum head as far away from the baseboards as possible.
Consider upgrading to a robot vacuum
Most modern robot vacs have changeable settings that allow you to control the suction power and navigation intensity – meaning that when your robot vac comes close to a wall, furniture, or other obstacles in its way, it immediately dials up its sensitivity to avoid knocking into things.
In this case, the robot vacs side brushes sweep up and suck up the debris on the baseboards as it travels along the walls without touching the baseboards at all.
I’ve owned a robot vacuum for several years now. I can confidently say it’s been one of the best life-changing appliances I have owned.
If you were to put a dollar figure on your time, how much is it worth to you? You can reclaim time with robot vacuums.
Check out this recent article I wrote on the benefits of robot vacuums, and whether are they worth the money.
Check out these robot vacuums on amazon here.
Best ways to repair chipped baseboard
You can repair most simple chips and dents in baseboards by using a putty compound filler that can be found at most local hardware stores.
Many people use a variety of compounds to fill the chips in baseboards. With a little finesse and patience, you can use drywall compound to fill more complex contours on your baseboards.
Filler compound on Amazon
How to remove marks from baseboards
Most scuff marks that appear on your baseboards are fairly easy to remove using a non-abrasive rag or sponge and a non-corrosive general cleaning solution.
Make sure not to rub too hard when cleaning. Doing this can rub off some of the paint on your baseboards.
Final thoughts
Although vacuums are great machines that provide you with a convenient way to clean your home, the negative points are that they are usually bulky and cumbersome to control, increasing the risk of scratching and scuffing the things in your home.
However, some of the latest vacuum cleaner manufacturers have come up with some pretty streamlined designs that are ergonomic and easy to handle, even for kids.
But for those who are still using older vacuum cleaners, the tips highlighted above should hopefully stop your vacuum head from scratching up or scuffing your baseboards, giving you the peace of mind that you deserve


