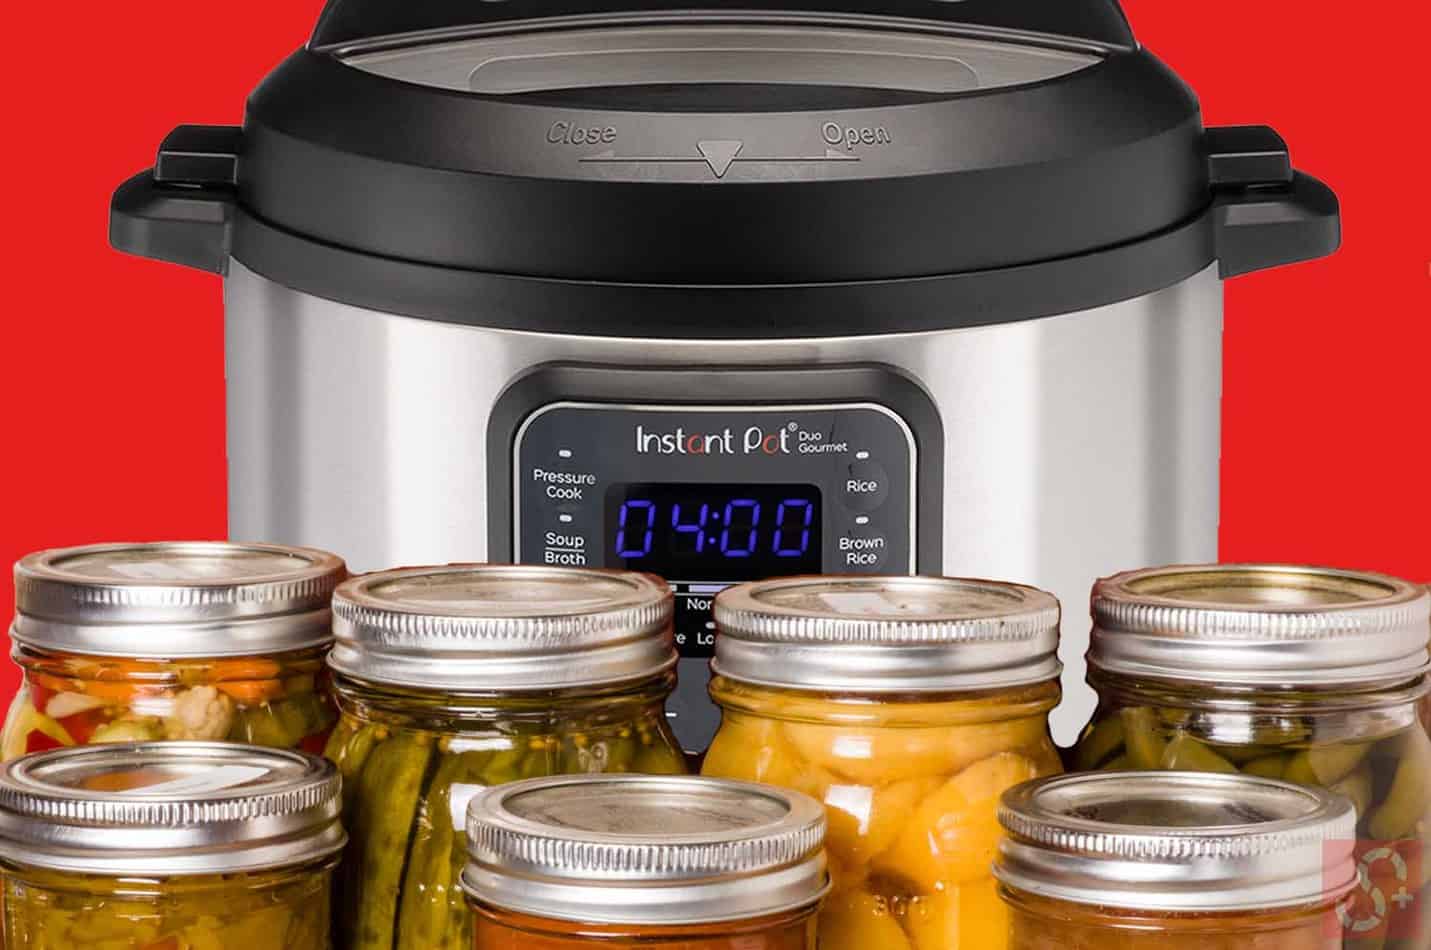
An Instant Pot is a fantastic appliance, providing a wide range of cooking options for you to take advantage of. There is almost no limit to the new and exciting dishes you can cook up using an Instant Pot.
I think we all can agree we want our food to last longer in our household, and the Instant Pot is one of the most versatile appliances for the job.
After researching more into canning and testing it out for myself, I found out you can ONLY do water bath canning in an Instant Pot, but it may be one of the best options you have if you don’t have a large pot or pressure canner.
Do not pressure can in an electric pressure cooking! Although the Instant Pot has not approved pressure canning, you’re able to can high-acid foods in an Instant Pot by water bath canning. This method uses boiling water to create pressure inside your jars.
LATEST VIDEOS
If you’re interested in learning about water bath canning in an Instant pot, please read below
Today we’ll explore what canning is, what it can offer you, and most importantly: How you can begin canning with your Instant Pot in no time at all!
Water Bath Canning vs. Pressure Canning
I know you came here looking for how to use an Instant Pot for canning, but please bear with me. Going over the
the two forms of canning are quite vital.
Canning is done with almost every canned good you’ll find on the shelf at your local grocery store.
Pressure Canning
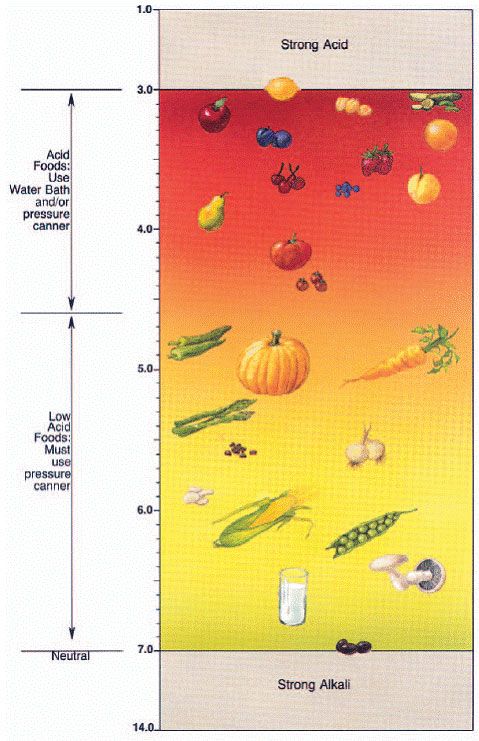
Pressure canning is the act of preserving low-acid food like meats, potatoes, and green beans in a jar and providing them with extended shelf life.
Using a pressure canning machine is required when canning meats and other low-acid food.
Water Bath Canning
Water bath canning is the act of cooking and preserving high-acid foods like berries and cucumbers.
Water bath canning is done by placing your desired canning foods into a jar or can and then putting the can into a high-temperature environment to begin the process.
The air is driven out of the can or jar then a vacuum is formed, sealing the food inside for long-term preservation.
The seal will prevent any air from getting inside, reintroducing micro-organisms that break down your food.
If you’re an Instant Pot fanatic like I am, check out this cool free course, I found on Teachable here!
The Benefits Of Canning
Food canning is a great way to preserve some foods for up to 5 years. You can save money canning your food by buying in bulk and storing it for later consumption.
If you don’t have time to cook a meal for your family, just walk over to your pantry, grab a jar, and voilà, and you have instant dinner.
When you buy canned goods at the supermarket, expect more salt and sugar than you might want to consume.
Since you’re doing the canning yourself, you have control over all additional additives.
There is a large growing population that enjoys the taste of foods they canned themselves. Sometimes I like to dress up my canned food with seasonings like thyme, rosemary, oregano, black pepper, and other herbs.
Canning Food Chart

Get started with water bath canning in an Instant Pot
To begin canning your foods for preservation, you’ll only need a few simple materials. These include:
- A range of suitably sized heat-tempered jars. Make sure any container you use has a sealable lid. Note: The only reusable parts are the jar and the metal screw band. You will need a new metal lid when canning.
- Metallic canning funnel(optional)
- A range of meat, vegetables, or beans that you wish to preserve.
- Canning Jar lifter
- An Instant Pot
- Metallic ladle
- A steam rack trivet, like this one, is compatible with the Instant Pot.
That’s it!
Is Canning In An Instant Pot Safe?
IMPORTANT
It is essential to make sure all your canning items and environment are clean and sterile. Any bacteria trapped in your canned food will spread and make you sick if consumed.
You can be subject to health risks without taking the proper safety precautions!
Botulism is the most commonly associated food-borne illness with home-canned foods.
Make sure to follow the USDA-approved procedures to make sure everything is safe when you’re canning.
Here are some great resources to learn more about home canning safety.
USA: USDA – Complete Guide to Home Canning
Canada: Health Canada – Home canning safety
When It comes to equipment that contains pressure, it could be dangerous. In a recent article, I address all the essential ⛔️ safety tips when using an Instant Pot.
How to Use Your Instant Pot for Water bath Canning
It’s important to note that there are multiple types of canning methods, and we will not be using a pressurized method with your Instant Pot.
A pressure cooker is not the same as a pressure canner!
If you wish to do the pressure canning method, you’ll need to pick up a proper canning machine.
Yet that doesn’t mean you can’t begin canning some types of foods! Thankfully you can use water bath canning to preserve a wide variety of foods.
Add a multicooker to your arsenal
It can be challenging not to have the proper equipment for the job.
At the same time, I don’t want to fill my cupboards with 30 different pieces of equipment to achieve different things.
That’s why I invested in a multicooker, which is pretty darn close to cooking 30 different ways.
I’ve created a complete guide here on how multicookers can cook a variety of things all in one pot and will fit your budget too.
Step-By-Step Water Bath Canning with the Instant Pot
Let’s take a step-by-step look at how to begin water bath canning with your instant pot:
Step 1: Wash & Inspect
Grab all of the jars that you wish to fill with your food items and give them a thorough clean. This is vital to make sure your jars are in good condition for the canning process.
Make sure to rinse well, and as you’re drying them off, inspect the jars for any cracks or chips. Most importantly, around the sealing area at the top. Once you have all of your jars cleaned and inspected, you’re ready to move on.
Step 2: Fill Your Containers
Firstly, fill your containers with the foods you wish to preserve. Then fill it with hot water or vinegar solution.
Be careful not to overload your containers. Remember that these will be sealed shut, so if you have overfilled them, this can get in the way of the sealing process.
Step 3: Wipe the Rims
Take a moment to inspect the rims of your containers and wipe them down. Make sure that nothing is there to get in the way of the sealing.
If there is any leftover residue on the rim of your containers, it can prevent an adequate seal.
Step 4: Lid Your Containers
This step will be different depending on the kind of container you have chosen to use. However, as long as the container is canning safe(tempered glass jar), it will come with appropriate lidding options.
Place a new lid on top of your jar, and slightly turn it shut. Do NOT screw the lids on tight. That isn’t required and can often cause the sealing process to fail. Simply screw it enough that it is firm.
Step 5: Place Your Containers in Your Instant Pot
Firstly, place your steam rack trivet into your instant pot. Then place your jars or cans in there afterward.
Then fill the Instant Pot with roughly 3 ½ cups of water, enough to cover the bottom of the trivet.
Step 6: Begin Canning
Now you’re ready to begin the canning process. Close your Instant Pot lid, ensuring it is sealed completely, and make sure the pressure valve is set to VENTING. This can be found on top of the Instant Pot lid.
Then press the “Steam” option on your Instant Pot, and the process will begin. This canning process will take roughly 10-15 minutes in total, and after it’s done, you’ll have freshly canned goods!


