Going shopping can be an enjoyable experience when you are shopping for something you want.
But we go shopping quite often to purchase items which are necessary, such as our groceries.
At times heading to the grocery store can be a bit stressful. Especially those busy times of the year when you feel that there are not enough cash registers open and you are stuck waiting in line for a while.
Or maybe you shop somewhere like Walmart, but many people have plenty of items, and you only have one or two, and line up behind them.
Although there are lines for an item of 12 or less, you can still get annoyed because there are plenty of times when this line is long and even moves slowly.
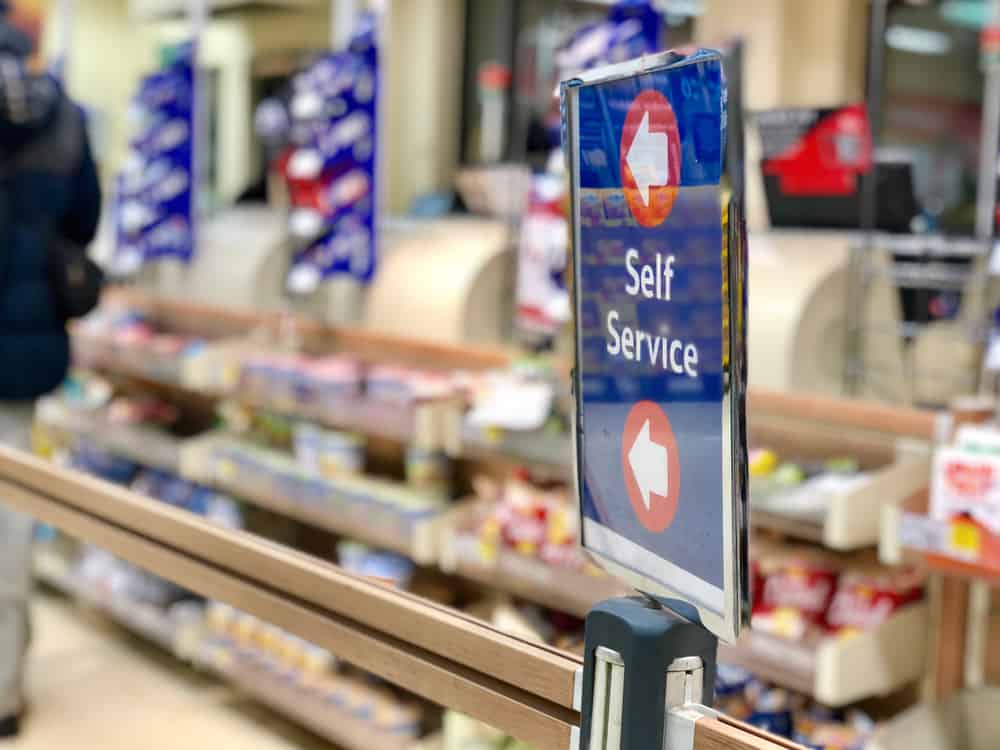
So you get excited because you notice there is an area where there is self-checkout, and you see that barely anyone is in that line. So you jump into that line, hoping it’s easy enough for you to check yourself out.
Once you get there, it feels like you need a user manual to start scanning. Plenty of times, we think we simply scan our items and go. But it doesn’t appear as simple as it seemed.
So you get turned off and want to jump back into the regular line. You were very hopeful, but it turned out to be a mess.
Although each major store has its steps to self-checkout, there are a few things that you can know ahead of time and general steps for you to take.
So that the next time you head to a self-checkout line, you’ll be armed with knowledge and will, therefore, know how to use the self-checkout machines to make your shopping experience a breeze.
LATEST VIDEOS
A step-by-step guide to self-checkout:
1. Organize your items at self-checkout
Each self-checkout setup is different. What will help you go through it smoothly is by organizing your items.
There is typically an area, like a small counter off to the side, where you can place your items. Sometimes you can directly place the basket onto it.
If you purchased quite a few items and they do not fit on the little counter space. Then, keep your things in the shopping cart.
A little tip is to scan the bigger items, or boxed items first.
2. Click the start button
Once you are in front of the screen of the self-checkout lane, check to make sure there is no error message, and you see a “start” button.
There may be times when you may not have to click a button to begin scanning, but in most cases, there is a button for you to click to start scanning.
You’ll probably notice that you’ve skipped this step if you start scanning, and you see that your items are not added to the list of items on the screen.
3. Scan your items
One of the best pieces of advice to know is that you should check to make sure that the products have barcodes.
Most grocery items that come in boxes have barcodes, and it’s not a problem.
But, if you are in Walmart, for example, there are times when you may pick up an item that doesn’t have a barcode. So, you’ll want to make sure that the item you are going to purchase has one.
The scanner is typically flat on the counter, and there is also a side scanner in most places.
You’ll want to face the barcode down onto it until you hear a beep sound, which means it has been scanned.
Making a smooth little swiping motion helps move things along as well.
4. Weighting items
Although some fruits and vegetables do not come with a bar code, it does not mean you can’t use the self-checkout.
It is much easier if the fruits and vegetables you are buying have a sticker with numbers on it. This way, you can key in the number on the machine for it to know which items you are buying.
But, typically, as long as you know the name of the fruit and vegetable you are buying, you can search for it on the machine.
Once you find that fruit or vegetable on the screen, select it. Then you place it in the weighing area. On the self-checkout machine, it is typically the same area as the area you use to scan all your other items.
5. Check the display
While you are scanning your items, you’ll want to keep your eye on the screen to make sure that it’s properly scanned.
The item with the price will appear there. You can also make sure that the items’ price is correct, that there is no discrepancy, especially if an item is on sale.
6. Move items to the bagging area
Most self-checkout machines are helpful and will tell you to move the items into the bagging area, once you have scanned it.
There are some machines that do not guide you. If you use a machine like this, all you have to do is notice if it has been scanned correctly. Once the item scanned appears on the screen, then you are ready to move it into the bagging area. Or, another little counter on the other side of the machine.
7. Scan rewards points
Don’t forget to scan your rewards points if you have them for a particular store.
As well as check to see if you are qualified to use your points for purchases.
Remember, it is as if you are the cashier, so you have to start paying attention to what is being scanned. Also, remember your rewards points so that you can get rewarded for shopping at that store.
8. Pay for items
Once you have finished scanning all your items and they are in the bagging area, and you’ve checked the screen, make sure that all your items as scanned.
Click the Pay button, each machine will differ, but generally, you will see a button to indicate that you are ready to pay for your items. The screen will display how you want to pay, debit, credit, or if available rewards points.
Select your method of payment. Then tap or insert your card onto the point of sale machine.
9. Remove your receipt
Make sure that you grab your receipt. The place where the receipts come out will differ depending on which store you are at.
Some are at the bottom of the scanning area, and some are near the machine, which takes your payment.
Things to keep in mind
No cash
The intention of having a self-checkout section is to make checking-out run smoothly so that we do not require much assistance from staff members.
Therefore, many self-checkout machines don’t take cash. You can either use your debit card or credit card.
Keep this in mind if you plan on paying with cash.
Discount items
Unfortunately, this may be the one downside to using self-checkout. When you have items that are on sale or offer a discount, it may take an extra step of having to call over a staff member to verify the discount.
If items are on sale, make sure that you check to see if the sale amount was correctly scanned.
There may be times when this happens, the one that you can only do is be aware of it. It can put a damper if it doesn’t scan as the sale amount, and you will have to call over an attendant to check the price.
Price matching
Unfortunately, for people who do a lot of price matching at the stores, you cannot do this at the self-checkout aisle. You will have to have a cashier do a price match for you. Keep this in mind if you intend to ask the store to price match the item you are purchasing.
No barcode items
One of the things, when you are shopping and are planning on using self-checkout, is to make sure that all the things you are purchasing have a barcode.
It is also time-consuming and defeats the purpose of the efficiency of self-checkouts if your product doesn’t have a barcode on it.
Bagging area
The bagging areas of self-checkout differ between the stores.
Some bagging areas are sensitive and know when you place items in the area before scanning it. It will also warn you to tell you to put your recently scanned item in the bagging area.
There are some stores where the bagging area is quite small. It would help if you got to know the self-checkout aisles in the store. Because, if the bagging area is small, it can be quite challenging to place many items there if you are doing quite a bit of shopping.
Make sure to organize the items you are scanning, as mentioned before. This will be very helpful in small bagging areas.
Scanning an item twice
Make sure not to scan your items twice.
Listen for the beep. Each deep will indicate each time a scan is made. If you accidentally scanned an item twice, you will have to ask for help from someone who works at the store. Only they will be able to remove the item from your bill.
Help button
You should not feel intimidated by using self-checkout machines because you can always ask for help.
If it’s your first time, or you need assistance with something, make sure to look for a button where you can ask for help.
There is usually a light by the machine which will flash and allow notify an attendant that you need help.
A word of advice is don’t just stand there and wait. Look around for the attendance, sometimes they may not notice your light flashing, and you may be waiting a while.
If you can flag them down yourself, then they will most likely come by and help you sooner rather than later.
Now that you have a general idea of what to expect when using the self-checkout machines at the major stores. You can check out these individual videos on how to use the self-checkout at each major store.
Conclusion
Using the self-checkout can change your shopping experience!
You will be able to save time and minimize hassle, as long as you follow the advice given above.
You will be able to enjoy shopping and getting things done with ease.
Happy shopping.